


Most women agree that the lipstick is the most powerful and efficient item in their makeup kits. Different lipstick hues bring on different looks – sexy and sultry, fresh and natural, powerful and daring, or sweet and feminine and it accentuates one of the best highlights of your face.
The ladies will confirm that sometimes finding that specific shade of red, pink, orange, brown or purple (or even some crazy-colored ones such as blue or green) that they’ve been looking for is mission impossible, no matter how many sticks or tubes they have tried. You have probably experienced the exact same thing, too.
What could the solution to these woes be? Creating your very own custom-colored lipsticks in the comfort of your home. If you don’t know, this is the perfect place to learn how to make lipstick and adjust every aspect to your personal taste.
Why you should make your own lipstick
Creating your own lipstick makes sense when you can’t find the color that you like, but it doesn’t stop there. There are lots of reasons why women channel their inner chemists and make their own rouge, and here are some of them:
1. To address sensitive issues
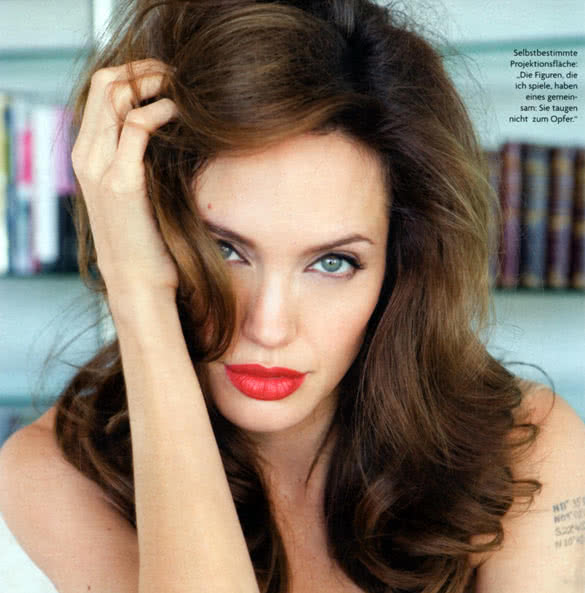
We all want lips like Angelina Jolie’s, but not if they look like a wasp has stung them! You will never know what is in that tube unless you read all the ingredients – and honestly, who ever reads those tiny words on lipstick boxes, anyway? Unfortunately, there are ingredients in lip color products that can trigger allergic reactions in many people.
In making your own lipstick, you get to make sure that there are no allergy-inducing ingredients in your own tube. This works if you know what you are allergic to, but even then you can try to avoid common allergens found in manufactured lipsticks such as nickel in lipstick tubes or emollients, perfumes and flavorings, colors, solvents and other compounds.
2. They’re cost efficient
Let’s face it, there is always a twinge of regret that accompanies a lipstick splurge, especially if you purchased a lipstick for a party, and you aren’t sure when you are going to use it again. Rising costs of quality lipsticks have also led to the rise of cheaper alternatives or worse – knockoffs.
While some drugstore brands are great, it’s always a hit or a miss with them, especially when it comes to color. Making your own lipstick is a more cost efficient approach and won’t make you feel guilty when it’s time to toss your makeup out after a couple of years of non-use.
3. It’s a great hobby and they make awesome gifts
The holidays are already over, but that doesn’t stop you from giving out presents to your friends. Birthdays and other celebrations are great times for you to give out your homemade lipsticks, which actually works well because you can choose the hues and ingredients to go inside your products.
4. Uniqueness and creativity
In choosing your own custom blend colors, you know that there’s simply no one else on earth wearing that exact same color. You are not going to worry that someone else is wearing your signature shade.
It is rather satisfying to see everyone else admiring your lips and not knowing that even if they search heaven and earth (except for your house, of course!) they are never going to find its exact same color. Plus side, if they really want what you’re wearing, you can sell it to them, but that’s another story!
5. Tailored to suit your needs
We all know that we’ve got different undertones from everyone else, and it goes beyond the “warm” and “cool” classification. Wearing the wrong lipstick shade on your complexion may lead to looking sallow and dull, and it can be very unflattering.
In creating your own lipstick, you can mix colors in order to find your perfect MLBB (my lips but better), your perfect red, your perfect nude and your perfect bright. We, ladies, know how difficult it is to look for “the perfect one”.
How to make lipstick in a few easy steps
Given these reasons, I’ll walk you through a couple of DIY tips and tricks to make your own lipstick and lip gloss.
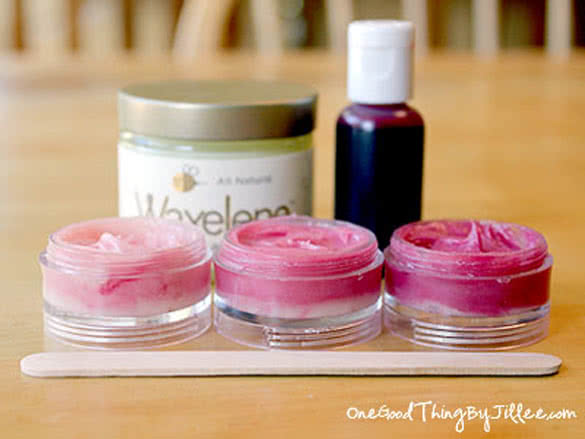
The basic lipstick recipe
We all want to be given the easy way to achieve things, and the same can be said for making lipsticks. This basic recipe requires the following ingredients:
- A teaspoon of beeswax pastilles (the waxes are in pill-like form)
- A teaspoon of either Cocoa or Shea butter, to make it moisturizing
- A teaspoon of coconut oil
- A pinch of natural coloring
To start your little lipstick project, simply place the butter and coconut oil in a glass jar. Once they’re in, drop the jar in a pot of simmering water and wait for the butter to melt. Once it melts, add the optional pigments and ingredients. Transfer the contents to a tub or container and wait for it to harden.
If you want it to have a little color, try cocoa powder for it to be brownish or nude, and beet root if you want it to be a sheer red. A little turmeric gives the mixture an orange hue. Experiment with the amount needed in order to reach the desired pigment.
If you’re more of a matte lover, you can add ¼ teaspoon of bentonite clay, which is totally safe for the lips. If you want it to smell good as well, you can add a drop of your favorite natural essential oil as well.
Fun way to make a lipstick: crayon lipsticks
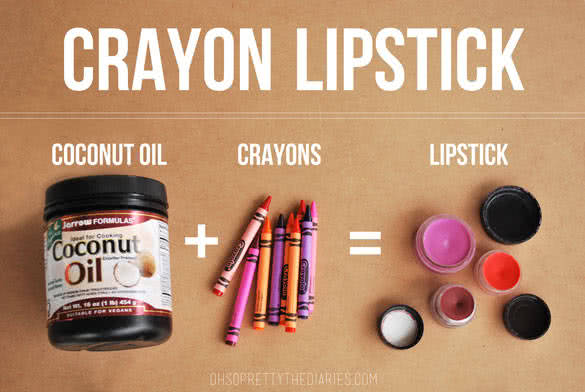
This is another fun way to create your own lipstick, especially if you’re looking for really vibrant out-of-this-world colors like neon green or aquamarine. Crayons are made primarily from wax and pigment and they’re relatively safe to use. After all, kids eat them all the time and they turn out perfectly okay.
- A box of crayons, preferably the Crayola box with 64 pieces for unlimited shade options and combinations.
- Shea or cocoa butter
- Extra virgin olive oil, almond oil, coconut oil, argan oil or coconut oil
- An empty lip balm tube or any container.
- Essential oils, to mask the waxy, crayon-like smell
Choose your special color combination. You can use one whole crayon, or a combination of colors. Go crazy on how you’ll ratio them! You will need an equivalent of one stick of crayon in order to fill a tube.
Choose crayon brands that are known to be safe, such as Crayola. Unwrap the label and melt the crayon down by setting it inside a small saucepan, and setting the small saucepan onto a larger one. Place the saucepans over medium heat and let the crayon melt.
When the crayon has melted, pour in your oil – you can choose whatever you’re comfortable with (some people are sensitive to certain kinds of oil, so make sure that you don’t have an allergic reaction to the one you’ve chosen.) You can also place a drop of essential oil in order to mask the crayons waxy smell.
After the mixture has melted, pour it inside the container and place it in the freezer so that it will harden. Et voila! You have your own crayon lipstick.
Just a little note, though: While it’s been tried, tested and used by many women (you can check tons of posts and forums talking about it) and the fact is that crayons do not contain ingredients that are harmful to the body, they have not been tested for skin use so you should use this recipe at your own risk. I suggest you start off with one color and try it for a short period of time to check for any effects. If all is good, go ahead and make some more.
Use your old lipsticks
This is a cost effective method that allows you to reuse your existing lipsticks, and works well if you have a couple of tubes that you never really liked. Some lipsticks may be too purple or too orange or too brown, so you can mix and match them to get your desired shade. This is also great for colors that you really love, but are too matte or too drying on your skin. To do this, you will need:
- Your existing lipsticks (make sure they’re not over the two years expiration date, otherwise throw them out)
- Small cosmetic pots or tins
- Beeswax and petroleum jelly (optional)
For a “color upgrade” simply place your old sticks (without the tube, of course) inside a microwave-proof bowl and microwave for a couple of seconds. Mix the melted colors together and pour into cosmetic pots or tins and wait for it to cool and harden.
For a more moisturizing effect, place the lipsticks in a heat-proof bowl and set on to a pot with hot water. Bring water to a boil while slowly mixing the sticks. Add beeswax or petroleum jelly and mix until everything is combined. Take the mixture out and pour into pots or tins. You’ll get something sheerer yet more moisturizing.
Natural lip glosses and stains
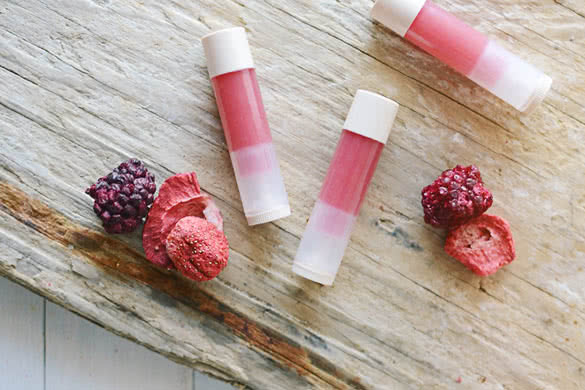
Not all women prefer matte over glosses – there are some who love to look fresh and young by slicking on lip gloss instead. If you’re a gloss girl and you want to make your own unique take on the universal shiny stuff, here’s what you have to do. First, gather the following:
- A cup of berries
- A couple of drops of aloe vera gel or olive oil
- Petroleum oil
- Liquid Dropper
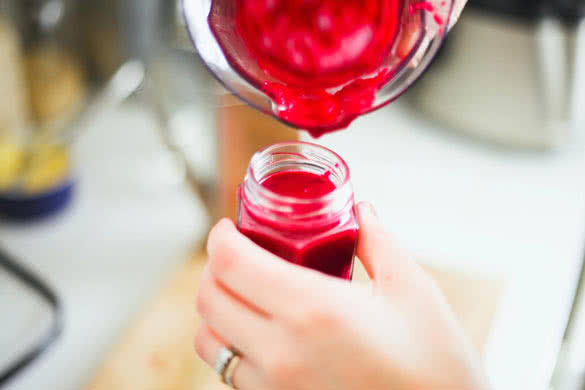
Take your berries, de-seed them and wash them properly. Different types of berries will produce different kinds of colors, so you can choose a color combination that will work. Popular choices are blueberries, raspberries and cranberries. You can also choose a single type of berries if you want.
Smash the berries to a pulp and then mix with aloe vera gel (for a gloss) or olive oil (for a darker lip stain). This mixture should last for a week when stored inside an airtight container and refrigerated, so don’t make too much when you do.
Tips on how to make your lipstick last longer
Not all lipsticks are created equal, and some of them may have weaker staying power than others, especially if they have less pigment. The staying power also depends on your lifestyle choices – if you snack more frequently or drink hot beverages on an hourly basis, then your lipstick definitely won’t last until lunchtime.
Fortunately, ladies all over the world have pooled in their tips on how to make your lipstick last longer, regardless of its twenty-four-hour-staying-power claims.
Whether you’re using lipstick from the store or something you made by yourself, here are a few tricks to follow:
- Fill in your lips with a lip liner. Lip liners aren’t just there to remind you to color within the lines – they also act as a base that can make your lipstick last longer and for the color to be brighter. Choose a lip liner that has the same color as your lipstick and fill in your lips. Make sure to wear a lip balm underneath as this can be quite drying. After you’ve filled in your lips with short, soft strokes, swipe on your lipstick.
- Try the blotting method. After you put on the first layer of lipstick, blot it lightly and reapply the second layer so that the color will pop and it will stay on longer.
- Use a lip brush when applying lip color. While it’s so much more convenient to swipe it straight from the tube, this is probably a given if you’re using DIY lipsticks that are stored in pots and tins. Take the extra time to fill in your lips with a brush instead.
- If you believe in hydrating your body every now and then (we all do!) use a straw to drink water instead of sipping from a glass.
Beauty products are supposed to be tools that should complement your natural beauty, not come in conflict with it. In cases of irritations to certain products and brands, it’s better to find organic, natural alternatives that are beneficial to your body and will suit your needs. Likewise, if you really can’t find a color that suits your skin, go ahead and make it, and have fun while you do.
Do you have DIY lipstick or lip gloss recipes? Feel free to share them by commenting below.


thank you
Love this. Thank You.
you have now just given me faith to start my own lipstick brand which is what I have always wanted to do.
Thanks a lot for giving me So many Ideas. Now Will too Start My Own Brand Of Lipsticks. Woohoooooooooooo.
Regards
I enjoyed the information you shared because I am interested in making my own lipstick to possibly start my own lipstick line. Do you have any tips or suggestions on how I could get started once I make the lipstick & I was also wondering if there is a specific type of coconut oil you have to use?
So like omigod. I like totally love this for realzzies. Thank you so much like omigod.
I love the idea,Thanks for this. I’m definitely gonna give this a try
thank you I can not wait to make my own first lipsticks
I love your ideas! I also make my own lipstick! However, I usually use vaseline/petroleum jelly in lieu of coconut oil for my base. I also use eyeshadow to create the colors. It lasts a long time and my lips feel amazing once the lipstick is removed… I feel like it is great for matte lipsticks because
1.) It is a lot easier to take off.
2.) It adds moisture, while regular matte lipstick dries out the lips sometimes.
i would love to try this, but does anyone know where i can get a natural blue pigment that’s safe to put on my lips?
Thank you for this information as I use your instructions to create my own lipstick line. This was very much helpful from you Justine.